May 5, 2025 | Benchamin Dian

Seasonal Roofing Maintenance Checklist for Homeowners

Owning a home comes with numerous responsibilities, and one of the most important yet often overlooked aspects of home maintenance is taking care of the roof. A well-maintained roof protects your home from the elements, keeps energy costs low, and ensures your family’s safety. However, many homeowners only think about roof repairs when there’s a noticeable issue. Seasonal roofing maintenance, performed throughout the year, can extend the life of your roof and help prevent costly repairs.

In this blog post, we’ll walk you through the essential seasonal roofing maintenance checklist, offering tips to keep your roof in great shape all year long. Whether you’re a new homeowner or a seasoned pro, having a useful source for roof care guidance can make all the difference in maintaining your investment and avoiding unexpected damage.

Spring: Post-Winter Roof Inspection

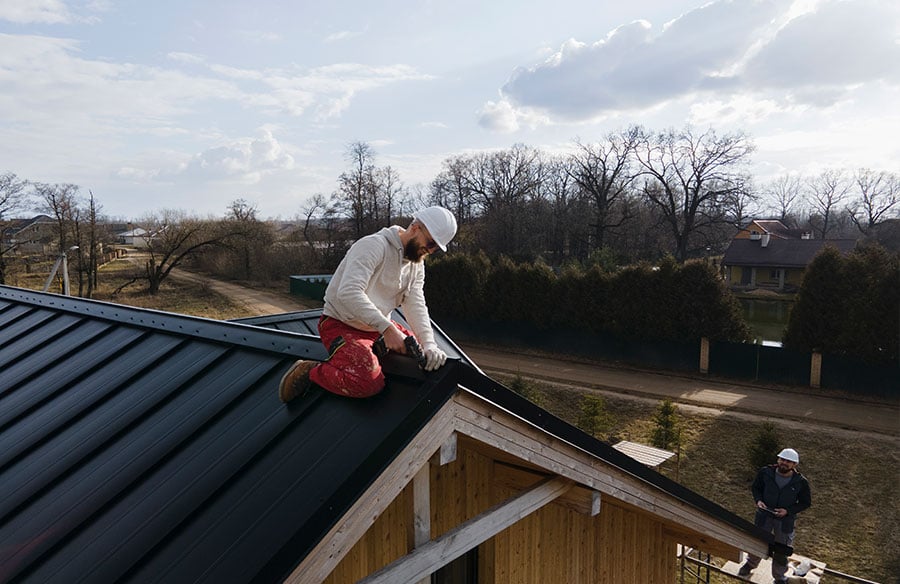
As winter comes to an end, it’s important to inspect your roof for any damage caused by snow, ice, or freezing temperatures. These harsh conditions can result in leaks, ice dams, or loose shingles. The spring inspection is a great time to check for these issues, as the melting snow can reveal hidden problems.

Start by checking your roof from the ground level with a pair of binoculars. Look for any visible damage such as cracked or missing shingles. Ice dams often form along the eaves and can cause water to back up under shingles, leading to leaks. If you suspect ice dams, it’s best to have a professional roofer inspect your attic and roof for moisture buildup.

Another key area to check is your gutters. They should be cleaned thoroughly to remove any debris, such as leaves or twigs, which could prevent proper drainage. Clogged gutters can lead to water pooling on your roof, increasing the risk of leaks.

Summer: Preventative Maintenance and Cleaning

In the summer months, the roof is exposed to intense sun and heat, which can cause the materials to deteriorate over time. Performing preventative maintenance in the summer will help ensure that your roof remains resilient against these conditions.

Begin by checking for any moss, algae, or lichen growth on your roof. These can be harmful to the shingles and lead to premature aging. If you notice any of these growths, you can clean them off with a mixture of water and mild detergent or invest in a professional cleaning service. However, take care not to use harsh chemicals or power washers, as they could damage your roof.

Summer is also a great time to inspect your attic for any signs of water damage. Hot temperatures can amplify the effects of leaks, so if you notice moisture in your attic or ceilings, it’s time to call in a roofer to address the issue.

Fall: Preparing for Winter Weather

As the fall season sets in and temperatures begin to drop, homeowners should focus on preparing their roof for the upcoming winter months. The biggest concern during this season is ensuring that your roof can handle the snow and ice that may accumulate in the coming weeks.

Start by clearing any remaining leaves or debris from your roof and gutters. Clogged gutters can prevent water from flowing freely, leading to ice dams when the temperatures dip. Additionally, remove any branches or tree limbs that could potentially fall on your roof during winter storms.

If you live in an area prone to heavy snowfall, it’s a good idea to inspect your attic for proper insulation and ventilation. Without proper insulation, heat can escape through the roof, causing snow to melt unevenly and refreeze, creating dangerous ice dams. Proper ventilation ensures that the attic remains cool during the winter months, preventing snow from melting and refreezing.

Winter: Regular Inspections and Ice Dam Prevention

Winter is a tough season for roofs, especially in areas that experience freezing temperatures, snow, and ice. While it’s difficult to perform regular roof maintenance in the winter due to weather conditions, it’s still important to keep an eye out for potential issues.

First, inspect your roof after any significant snowfall to ensure that no damage has occurred. Look for areas where snow may be accumulating excessively or where it appears that ice dams may be forming along the eaves. Ice dams can cause significant water damage, so it’s crucial to address them as soon as possible.

If you notice icicles forming, it could be a sign of an ice dam forming underneath the snow on your roof. In such cases, consider hiring a professional roofing contractor to safely remove the ice and prevent further damage. Additionally, check the attic for any signs of moisture or ice buildup, as this can signal that there’s inadequate ventilation or insulation.

May 5, 2025 | Benchamin Dian

Decking Installation: Top Tips for a Smooth Process

Installing a deck can be an exciting project that enhances your outdoor living space, offering a perfect spot for relaxation, entertainment, and enjoying nature. Whether you’re a seasoned DIY enthusiast or a first-timer, understanding the steps and key considerations for a successful decking installation is crucial to achieving a durable and beautiful result. In this blog post, we will walk you through essential tips to ensure your decking installation goes as smoothly as possible.

Planning and Preparation

Before diving into the installation process, careful planning is essential to avoid common mistakes and setbacks. Start by assessing the space where the deck will be installed. Measure the area accurately, considering the shape, size, and placement of your deck. Make sure to check your local zoning laws and building codes, as these may influence the type of deck you can build, the materials you can use, and how the deck should be constructed.

It’s also wise to choose the right materials based on your climate and the deck’s intended use. Pressure-treated wood, cedar, and composite materials all have their advantages, with composite being low-maintenance, while wood offers a natural aesthetic. Once you’ve chosen your materials, make sure to order enough supplies to complete the project, factoring in any mistakes or adjustments that may arise.

Tools and Equipment

Having the right tools and equipment is essential to a smooth decking installation. Depending on the size and complexity of your project, you may need a range of tools, such as a saw, drill, hammer, measuring tape, and spirit level. Additionally, a power sander can be useful for smoothing rough edges of wooden planks, and a power drill will ensure secure, professional-looking screws.

Before starting, take inventory of all the necessary tools. Having everything on hand will save you time and prevent unnecessary trips to the hardware store during the installation. If you don’t already own certain tools, consider renting them from a local equipment rental service, as purchasing tools for a one-time project may not be the most cost-effective option.

Building the Foundation

A solid foundation is critical for the long-term stability and durability of your deck. Start by ensuring that the ground where the deck will be built is level. Uneven ground can cause issues with the deck’s structure and lead to instability over time. If the ground is not level, consider grading the area to create a more even surface.

Once the ground is prepared, begin installing the deck’s support structure. This typically includes posts, beams, and joists that will support the deck boards. Ensure that the posts are securely anchored in the ground, as the foundation of your deck needs to be strong enough to support the weight of people, furniture, and the decking materials.

Decking Board Installation

When it comes to installing the decking boards, the key is precision. Lay out the first few boards along the outer edge of the deck, making sure they are aligned properly and spaced evenly. Use a spirit level to check for accuracy and make sure the boards are level with one another. The spacing between each board should allow for proper drainage to avoid water accumulation and reduce the risk of rot.

It’s also important to ensure that the boards are securely fastened to the joists. Use high-quality screws that are corrosion-resistant to prevent rust and ensure the deck boards stay firmly in place over time. If you’re using pressure-treated wood, it’s a good idea to pre-drill holes before inserting screws, as this can help prevent the wood from splitting.

Finishing Touches and Safety Considerations

Once the main structure of the deck is complete, it’s time to add the finishing touches. Trim any excess material from the edges of the deck, ensuring that the edges are smooth and straight. If desired, you can add railings, steps, or other features to enhance the look and functionality of your deck. Consider installing railings for safety, particularly if the deck is elevated, as these can help prevent accidents and provide additional support.

Safety should always be a top priority throughout the installation process. Be mindful of the weather conditions, as strong winds or rain can make the installation process more dangerous. Always wear appropriate safety gear, such as protective gloves, goggles, and a dust mask, especially when using power tools or cutting materials. It’s also important to check the stability of the deck structure as you go, making sure everything is tightly secured and structurally sound.

May 5, 2025 | Benchamin Dian

The Benefits of Installing a Multi-Level Backyard Deck

A well-designed backyard deck can transform an ordinary outdoor space into an inviting retreat. One of the most popular and versatile options for homeowners looking to enhance their outdoor living area is the installation of a multi-level deck. This design, which typically involves two or more deck levels connected by stairs or platforms, offers numerous benefits that go beyond aesthetic appeal. Whether you’re looking to create a space for entertaining, relaxation, or gardening, a multi-level deck is a practical and stylish addition to any home.

Maximizing Space and Functionality

One of the primary advantages of installing a multi-level deck is the ability to maximize your outdoor space. A single-level deck can be limiting, especially for larger yards. However, by incorporating multiple levels, you can create distinct zones for various activities. For example, you can have one level dedicated to dining and entertaining, while another can serve as a cozy area for lounging or reading. This allows you to make the most of your yard, offering a well-organized layout that enhances the functionality of the space.

Multi-level decks can be particularly beneficial for homes with sloping or uneven terrain. By designing a deck that follows the natural slope of the land, you can avoid the need for extensive grading or leveling. The tiered structure of a multi-level deck not only accommodates the topography but also reduces the risk of water pooling or erosion in certain areas, offering a more sustainable and practical solution to outdoor living.

Enhancing Visual Appeal

A multi-level deck adds a dynamic visual element to your backyard that a traditional single-level deck simply cannot achieve. The various levels create a sense of depth and dimension, turning a flat outdoor space into a visually intriguing environment. The multiple platforms give you the opportunity to incorporate different design elements, such as varying materials, colors, and textures, to create a more personalized look.

The use of different heights can also allow you to showcase unique landscaping features. You might design a lower level that provides a view of a garden or water feature, or place higher platforms to offer panoramic views of your surroundings. By varying the height and layout of the deck, you create a more interesting and engaging outdoor space that draws the eye and invites exploration.

Improved Privacy

For homeowners who value privacy, a multi-level deck is an excellent way to create secluded spaces within the yard. By strategically placing different levels in various areas of the deck, you can create private retreats that are shielded from the sight of neighbors or passersby. This is especially valuable for those who live in close proximity to others or in densely populated areas where privacy might be a concern.

The higher levels of the deck can offer a greater sense of seclusion, while the lower levels may be ideal for intimate gatherings or quiet time alone. This separation of spaces allows you to design the deck to meet your personal needs for privacy, whether you’re hosting a large party or enjoying a peaceful evening outdoors.

Increasing Property Value

A well-built, multi-level deck can significantly increase the value of your property. Outdoor living spaces have become an increasingly important feature for homebuyers, especially those who enjoy entertaining or spending time outside. A deck that offers multiple levels of space provides versatility and functionality, which can be a major selling point when putting your home on the market.

In addition to increasing the property’s appeal, a multi-level deck adds curb appeal by enhancing the overall aesthetic of the backyard. When potential buyers see a thoughtfully designed deck that seamlessly blends with the surrounding landscape, it can leave a lasting impression and set your home apart from others.

Creating a Sense of Connection with Nature

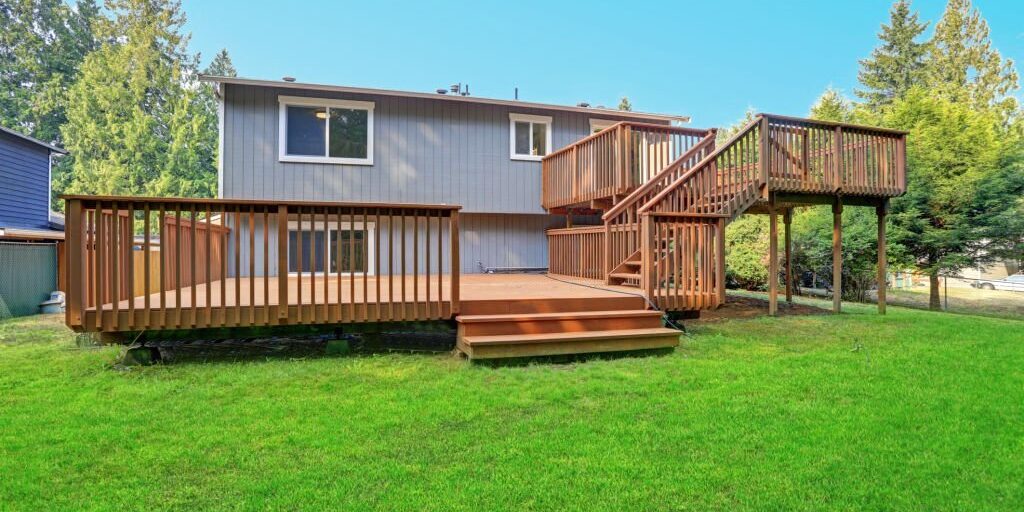
For many people, spending time outdoors is an opportunity to reconnect with nature. A multi-level deck can help facilitate this connection by providing a more immersive experience. Whether it’s a top-level platform that offers a sweeping view of the surrounding landscape or a lower deck that is nestled among trees and plants, the multi-level design allows for a closer interaction with nature.

By creating multiple levels, you can take advantage of different aspects of your backyard, from elevated views of your garden to a more intimate experience with natural elements at ground level. The design encourages you to spend time in different areas of the yard, enhancing the overall enjoyment of the outdoor environment.

Offering Flexibility for Future Additions

One of the great benefits of a multi-level deck is the flexibility it offers for future additions or modifications. If your family’s needs change over time, or if you want to update the deck with new features, a multi-level design makes it easier to add new elements without completely redesigning the space. You might decide to add a hot tub on one level, incorporate a fire pit on another, or even install a built-in seating area. The different levels provide ample opportunities for creative upgrades, making your deck a long-term investment that can evolve with your needs.